Picture this: You’re hosting a dinner party, the smell of freshly baked bread is filling the room, and your guests can’t wait to take a bite. They won’t believe you whipped up those warm, golden pita pockets from scratch! There’s something magical about making homemade pita bread – the soft, pillowy texture with just the right amount of chew, and the way it puffs up to create that perfect pocket. It’s a game changer for sandwiches, wraps, or even dipping in your favorite hummus.
Our journey with pita bread began on a lazy weekend when we craved something fresh and comforting but didn’t want the hassle of going to the store. We had flour, water, yeast, and a little bit of hope. With just a few ingredients and a lot of curiosity, we created what has become a staple in our kitchen. Every time we bake these pitas, they transport us back to that moment of simple joy – and trust me, once you’ve tasted the homemade version, store-bought will never quite cut it again.
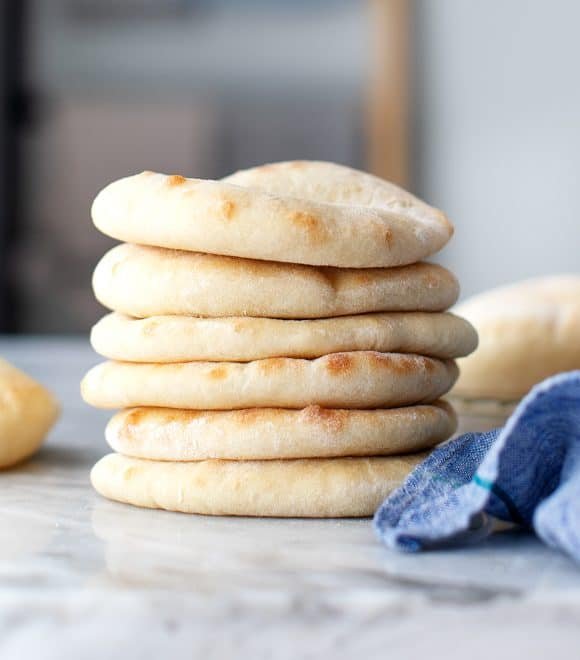
This is no ordinary bread; it’s the kind of pita bread that makes your meals extraordinary. Think tender, chewy, and golden on the outside, while soft and fluffy on the inside. Perfect for filling with grilled meats, veggies, or even enjoying solo with a generous slather of butter. Whether you’re a kitchen novice or an experienced cook, this recipe will surprise you with how easy it is to achieve such bakery-quality results. Let’s make some magic happen in your kitchen!
Introduction
Few things are as satisfying as making your own bread, and pita bread is no exception. It’s one of those recipes that’s so versatile, you’ll find yourself making it again and again. Whether you want to impress guests at a dinner party or simply enjoy a cozy, homemade meal, this pita bread recipe is your go-to for culinary success. With just a handful of ingredients, you’ll create something delicious, fresh, and absolutely memorable.
What makes pita bread so special is its simplicity. The ingredients are ones you probably already have in your pantry, but the result is something extraordinary – a perfectly puffed bread with a built-in pocket, ready to be filled with your favorite ingredients. The best part? You don’t need any fancy equipment or complicated techniques to make it happen. Just a little patience and a hot oven will do the trick.
If you’ve ever been intimidated by making bread, don’t be. This recipe is easy enough for beginners but impressive enough to wow seasoned bakers. And once you taste your homemade pitas, there’s no going back to the store-bought version. Ready to transform your kitchen into a bakery? Let’s dive into this foolproof pita bread recipe.
Yield and Total Time
- Yield: 8 pitas
- Total Time: 1 hour 45 minutes (including rising time)
Ingredients
- 2 cups all-purpose flour (plus extra for dusting)
- 1 teaspoon sugar
- 1 teaspoon salt
- 1 packet (2 ¼ teaspoons) active dry yeast
- ¾ cup warm water (about 110°F)
- 1 tablespoon olive oil
Directions
- Activate the Yeast: In a small bowl, mix the warm water, sugar, and yeast. Let it sit for 5-10 minutes until the mixture becomes frothy.
- Mix the Dough: In a large mixing bowl, combine the flour and salt. Create a well in the center and pour in the yeast mixture and olive oil. Stir until a shaggy dough forms.
- Knead: Turn the dough onto a lightly floured surface and knead for about 8-10 minutes until it becomes smooth and elastic. If the dough is too sticky, add a little flour at a time.
- First Rise: Place the dough in an oiled bowl, cover with a clean kitchen towel, and let it rise in a warm spot for about 1 hour or until doubled in size.
- Shape the Pitas: Once the dough has risen, punch it down and divide it into 8 equal pieces. Roll each piece into a ball and then flatten into discs about ¼ inch thick. Let the discs rest for 10 minutes.
- Preheat the Oven: Preheat your oven to 475°F (245°C) and place a baking stone or an inverted baking sheet on the middle rack to heat.
- Bake the Pitas: Place 2-3 pitas on the hot stone or baking sheet. Bake for 3-4 minutes or until they puff up and turn lightly golden. Repeat with the remaining dough.
- Cool: Remove the pitas from the oven and let them cool on a wire rack. The pitas will deflate slightly, leaving the characteristic pocket inside.
Tips for the Recipe
- Use a Baking Stone: It helps distribute heat evenly, ensuring the pitas puff up perfectly.
- Rest the Dough: Let the dough rest for at least 10 minutes after shaping the discs. This allows the gluten to relax and creates a better puff.
- Roll Evenly: Make sure each pita is rolled out to an even thickness, about ¼ inch, to avoid uneven puffing.
- Preheat Properly: A hot oven is crucial for the pitas to puff up quickly. Preheat for at least 20 minutes.
- Flip for Perfection: For an even cook, flip the pitas halfway through baking.
- Avoid Overbaking: Keep an eye on the pitas. Overbaking will result in crispy rather than soft and fluffy bread.
- Store in a Towel: After baking, wrap the pitas in a clean kitchen towel to keep them soft.
- Freeze for Later: Pitas freeze well! Store in an airtight container and reheat in a warm oven.
- Experiment with Flavors: Add garlic powder, herbs, or spices to the dough for a flavorful twist.
- Humidity Matters: If the dough is too dry, add a bit more water, and if it’s too sticky, sprinkle in more flour.
Substitutions
- Whole Wheat Flour: Swap up to half of the all-purpose flour with whole wheat flour for a heartier, nuttier flavor. Just note that the dough may need a little extra water to reach the right consistency.
- Gluten-Free Option: Use a gluten-free all-purpose flour blend. However, the texture will be slightly different, and you may need to add a binder like xanthan gum for elasticity.
- Dairy-Free: This recipe is already dairy-free, but you can use coconut or avocado oil in place of olive oil if preferred.
- Yeast Alternatives: If you don’t have active dry yeast, instant yeast works just as well. Simply skip the proofing step and mix it directly with the flour.
Conclusion
There’s something undeniably special about making bread from scratch, and pita bread is no exception. It’s a recipe that not only fills your kitchen with the comforting aroma of fresh bread but also leaves you with a sense of pride in creating something so simple, yet so perfect. Whether you’re using these pitas to wrap up a delicious shawarma or simply tearing them apart to dip into a homemade hummus, the possibilities are endless.
The best part about this recipe is its versatility. Whether you choose to stick with the classic or experiment with flavors, once you master the basics, pita bread will become a staple in your kitchen. You’ll never reach for store-bought pitas again once you’ve experienced the joy of baking your own.
Now that you’ve got this easy and rewarding recipe in your hands, it’s time to put it to the test! Grab your flour and let the magic happen. And who knows? Maybe you’ll be the one hosting a dinner party, wowing your guests with your perfect homemade pita bread. Keep an eye out for more delicious recipes, because your journey into the world of bread-making is just beginning!
Image by: Love & Lemons